
Welcome to the ultimate guide to water kefir, where you will find everything you need to know about this delightful beverage. In this comprehensive guide, we’ll explore the origins of water kefir, its potential health benefits, how to make it at home, and some extra tips. For me, making kefir became a real hobby. It’s a drink I wouldn’t want to miss in my life. It deserves more recognition! Depending on how you make it, the kefir can be so versatile. But I don’t want to spoil it all now, you’ll find out through this guide!
1. What is Water Kefir?
Water kefir is a fermented beverage. It’s made with kefir grains, which are a symbiotic culture of bacteria and yeast (SCOBY). These grains create a fermentation process that transforms sugar water into a tangy and satisfying drink. If SCOBY rings a bell, maybe you heard it before from kombucha. But kefir is, even though the two drinks have their similarities, very different. It is made with water and not tea, and Its SCOBY is many small, translucent, jelly-looking grains. Water kefir is known for its light, refreshing taste and can be enjoyed as a probiotic-rich alternative to other sodas and juices.

2. The Origins of Water Kefir
Water kefir is believed to have originated in Mexico, where it is traditionally known as “tibicos” or “tibi.” Today, it has gained popularity worldwide as a vegan-friendly and probiotic-rich beverage. Naturally, its SCOBY appears in some Opuntia cactuses, also known as prickly pear.
3. Water Kefir vs. Milk Kefir: What’s the Difference?
While water kefir and milk kefir share similarities in their fermentation process and probiotic content, they differ in terms of taste, texture, and ingredients. Water kefir is dairy-free and is made using water, whereas milk kefir uses milk as the base. It is also a different kind of SCOBY, so you cannot simply make milk kefir with water kefir grains.
4. Health Benefits of Water Kefir
The water kefir is a cocktail of many interesting yeasts and bacteria. A glass of water kefir will most likely contain billions of CFUs! And these microorganisms make kefir so interesting from a well-being perspective: It offers a range of potential health benefits due to its probiotic nature. While scientific evidence for the health impacts of the kefir is still scarce, some of the yeasts, bacteria, and fermented foods in general, have well-studied benefits!
Kefir may support your digestive health: The probiotics and lactic acid bacteria can promote a healthy gut microbiome, which is vital for overall health. It can support digestion and relieve digestive issues. Still, the potential health benefits of a healthy gut biome go far beyond this. It supports many key processes, such as the immune system. This article about the impacts of fermented foods on the microbiome and beyond is super interesting! Also, the antioxidant properties are promising for overall health.
Still, more research about water kefir is needed. It’s important to note that while the drink offers many potential health benefits, individual experiences may differ. It’s always advisable to consult with a healthcare professional before making significant dietary changes!
Kefir grains contain a diverse community of bacteria and yeast. Especially lactic acid bacteria and acetic acid bacteria are common. As the SCOBY consumes large parts of the sugar, water kefir is a low-calorie beverage. It provides small amounts of B vitamins, minerals, and organic acids.

Want to learn how to make this delicious strawberry basil kefir? Make sure to read until the section about secondary fermentation!
5. How to Make Water Kefir: A Step-by-Step Guide
Making water kefir at home is a simple and rewarding process. Let’s walk through the step-by-step guide:
Ingredients and Equipment for making Water Kefir
To make water kefir, you’ll need:
- Water
- Water kefir grains
- Choice of sugar
- Dried fruit
- Lemon or lime
You’ll also need the following equipment:
- Glass jar or container
- Breathable cover (cheesecloth or coffee filter)
- Rubber band
- Plastic sieve or strainer
- Non-metallic utensils
Factors to Consider with Choosing the Ingredients:
The kefir grains are the SCOBY. They contribute the bacteria and yeast needed to kickstart the fermentation. The SCOBY feasts on sugar, fermenting it into a delicious drink. Both white sugar and cane sugar work fine. The final taste is different depending on the source of sugar. Cane sugar gives a more caramel-like aftertaste. I usually go with plain white sugar, especially when making kefir where I want to do a secondary fermentation. It is more of a blank canvas that way. If using white sugar, dried fruits are necessary to supply the kefir with nutrients.
You can also go with mixes of sugar. Coconut sugar makes a great addition for flavor and it gives lots of nutrients to your kefir grains. This choice depends on your personal preference. Make sure to experiment to find out what you like most.
You can also experiment with syrups such as maple or agave syrup. I’d recommend only doing this if your kefir is healthy and used to its environment. Stay away from artificial sweeteners!

Here you see kefir ready to go into a solution of water and white sugar, with added lemon and raisins. This is my go-to combination.
Next, it’s advisable to add acidity to prevent other harmful bacteria from forming before the SCOBY starts doing its thing. I usually add a few slices of biological lemon to the kefir. While lemon juice does the trick, the lemon zest gives the final a fantastic taste! Furthermore, you might need to add some dried fruit to supply the grains with other nutrients. Figs or raisins work great. A tablespoon of them is enough for half a gallon of kefir. Make sure to use unsulfured fruits. Supplying additional minerals through dried fruits is not necessarily needed if you use cane sugar. This might depend on your SCOBY as well. You can adjust the ratios accordingly if it is developing too much yeast.
Can you use Tap Water to make Kefir?
Actually, it’s not recommended to use filtered or distilled water to make kefir. The water lacks nutrients, which the kefir grains need to be healthy. The kefir likes a lot of nutrients in the water, and tap water is usually the best choice. Usually, mineral-rich (hard) tap water is the best. Still, the answer to this question depends a bit on the drinking water in your region. Here in Germany, using tap water is perfectly fine for the brew. If the water has too much chloride, boil it off by heating it for at least five minutes. If your tap water is not safe for consumption, you shouldn’t use it to make kefir.
Important to note: Your kefir grains don’t like metal! I use plastic or glass equipment like a plastic sieve when working with the precious kefir grains. Make sure all equipment is nice and clean.
The Fermentation Process
Dissolve 1/2 cup of sugar in 8 cups of lukewarm water in a glass jar. Allow the water to cool to room temperature.
Once the sugar is dissolved, add the kefir grains to the jar.
Cover the jar with a breathable cover and secure it with a rubber band.
Allow the mixture to ferment at room temperature, away from direct sunlight, for 24-48 hours. The fermentation time may vary depending on temperature and desired taste. After fermentation, strain the liquid using a plastic sieve or strainer, separating the water kefir grains from the liquid.
Rinse and repeat:
Once done with the primary fermentation, strain the kefir grains in your plastic sieve. Rinse them thoroughly under cold water. Clean the fermentation jar thoroughly with hot water, and allow it to cool before starting the next batch. Keeping everything clean is key to keeping your kefir grains healthy and stopping harmful bacteria or mold from forming.
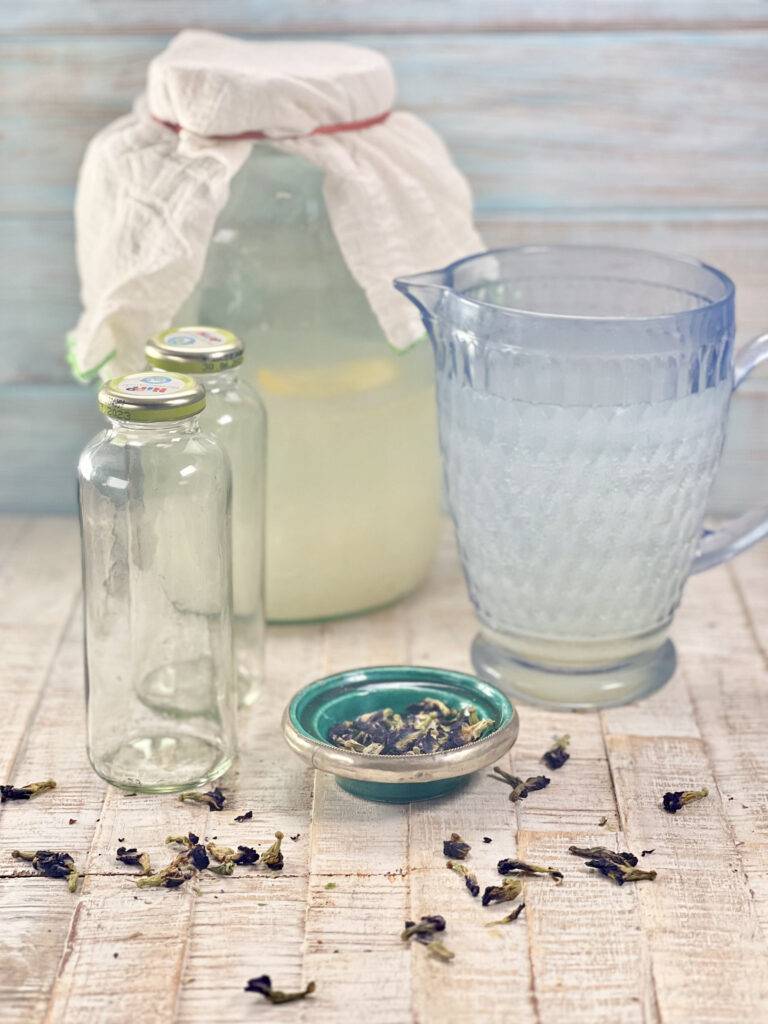
Here you see a batch of kefir ready for the most fun step: the secondary fermentation! I’ll add some butterfly pea flowers for a beautiful blue touch.
Flavoring and Second Fermentation
Now that you have the strained liquid, you can proceed with flavoring and a second fermentation. This step is optional. Your kefir will already taste amazing as it is. I often enjoy it just after the first fermentation. Still, the second fermentation makes it interesting. This stage is where you can get artistic: There is no limit to the delicious flavors you can achieve here. The kefir will continue to ferment the ingredients you add to it, leading to super funky and delicious tastes. It will never get boring.
Making the secondary fermentation is super simple. First, transfer the water kefir base into a clean glass jar or bottle. Add your choice of flavorings, such as (frozen) fruits, herbs, fruit juices, or spices. Allow it to undergo a second fermentation at room temperature for 24-48 hours. You should check in every once in a while. The time again depends on factors such as room temperature, the strength of your kefir base, the sugar content of ingredients you added for secondary fermentation, etc. If you want to slow the fermentation, transfer it to the fridge.
Out of laziness, I usually do the secondary fermentation in a bottle and store it in the fridge. It keeps for five days easily, and I strain the drink when pouring it into the glass. Otherwise, you can strain the water kefir to remove the flavorings and transfer it to a sealed bottle or jar for storage in the refrigerator once it reaches the desired flavor. This approach gives you some more control. Make sure not to fully close the lid, use a breathable cover, or to burp the bottle once in a while, to avoid the bottles exploding during the second fermentation. The water kefir is now ready to be enjoyed chilled.
6. Exploring Water Kefir Flavors
Water kefir offers a world of possibilities when it comes to flavors. Here are some of my favorite flavors for some inspiration:
Classic: This is the plain, unflavored version. It has a mild, slightly tangy taste and is the base for adding your flavors. Or enjoy it as is.
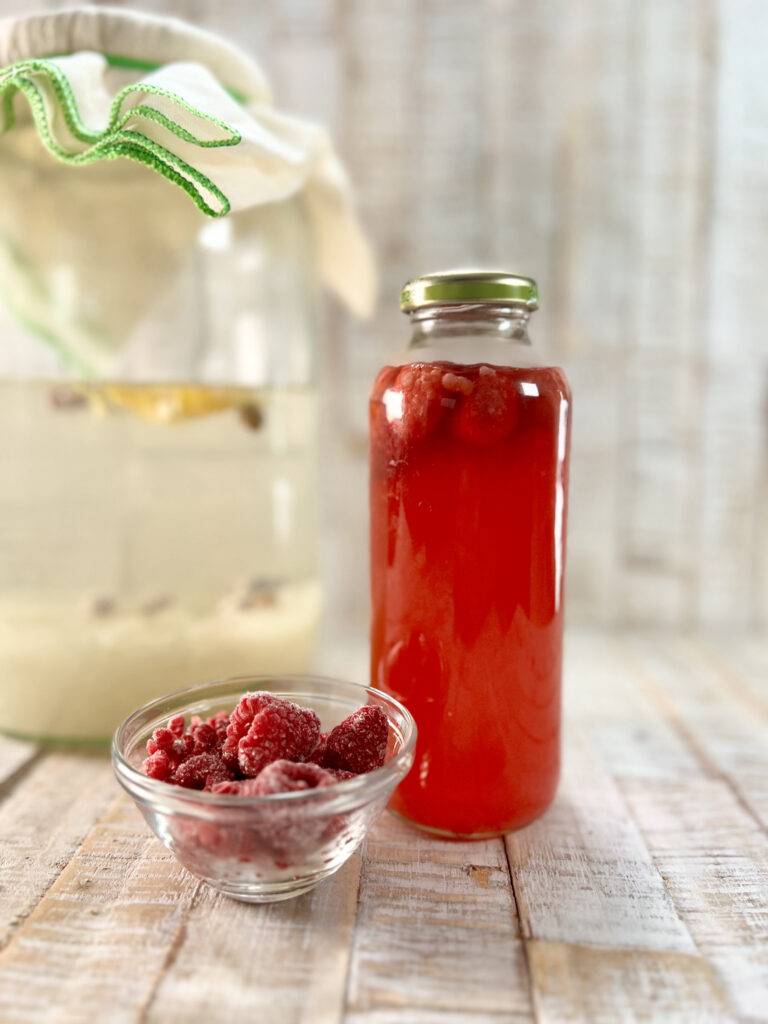
- Raspberry kefir:
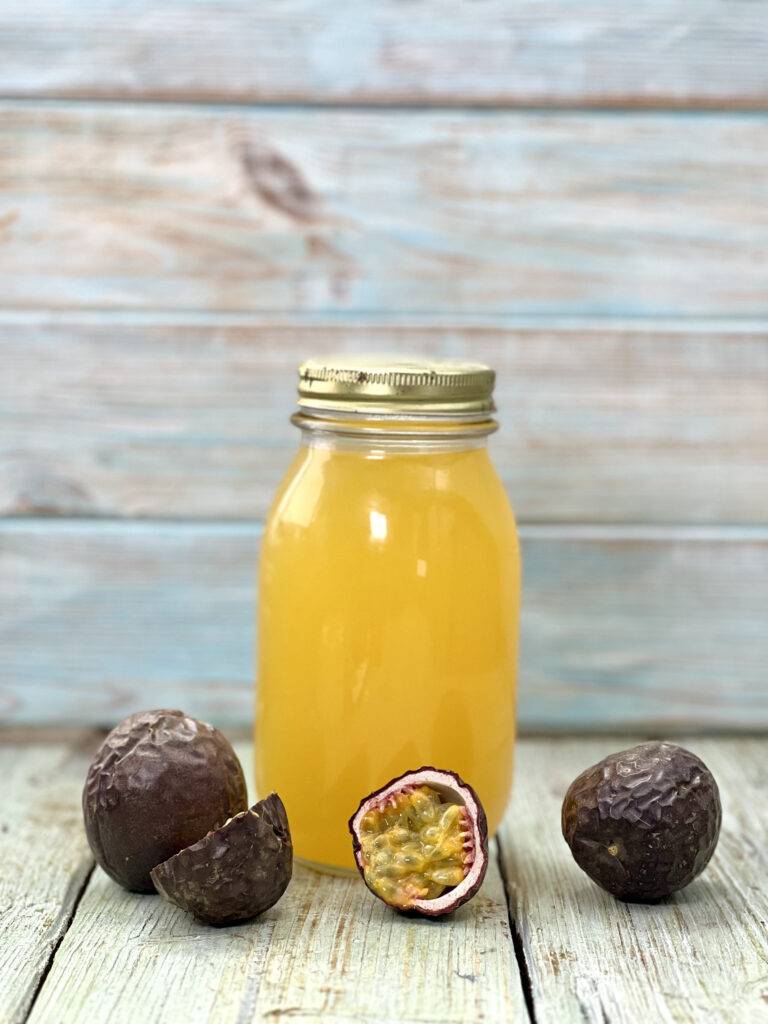
- Passion fruit water kefir
- Ginger kefir
- Apple cinnamon kefir
- Banana tonka bean kefir

- Green tea kefir
- Strawberry basil kefir

But don’t let this constrain your creativity: Infuse your water kefir with aromas and flavors of herbs, teas, fruits, juices, vegetables, or other botanicals. That’s the nice thing: You can do endless experiments to find your favorite kefir drink. The possibilities are endless!
7. Some more Inspirations
Water kefir is a versatile beverage that you can enjoy in various ways. Here are some ideas for incorporating it into your daily life:
Kefir smoothies or mocktails: Blend it with your favorite fruits and leafy greens to create delicious and nutritious smoothies. You can also use it as a base for refreshing mocktails by adding fresh herbs, citrus slices, or a splash of fruit juice. You can even add the kefir grains themselves to smoothies, but more about this in section nine.
Water Kefir as a probiotic boost: Start your day with a glass of delicious kefir to give your gut a probiotic boost.
8. Troubleshooting Common Issues with Water Kefir Fermentation
While making water kefir is relatively straightforward, you may encounter some common issues during the fermentation. Here are a few troubleshooting tips:
Weak or Slow Fermentation:
Make sure you’re using enough water kefir grains for the amount of liquid.
Check the temperature of the fermentation environment. Warmer temperatures promote faster fermentation.
Make sure the kefir has enough sugar available for fermentation.
Use organic cane sugar as it provides essential nutrients for the water kefir grains.
Over-Fermentation and Carbonation:
Keep an eye on the fermentation time and taste the kefir periodically. If it becomes too fizzy or sour for your liking, it may have fermented for too long.
Burp the bottles during the second fermentation to release excess carbonation and prevent explosions.
Contamination and Mold:
Use clean utensils and jars to prevent contamination.
If you notice mold or off-putting odors, discard the batch and thoroughly clean your equipment and kefir grains before starting a new fermentation.
Double-check if it is mold: sometimes, the kefir forms some yeast at the surface. This doesn’t have to be a concern. Most likely it is kahm yeast, which is harmless but might bring undesired tastes and looks. Rinse the kefir grains well under cold water, and ensure you are not oversupplying nutrients. Also, make sure to have some lemon added to the kefir.
9. Storing and Preserving Water Kefir

To store water kefir, transfer the strained liquid to a sealed glass jar or bottle and refrigerate it. It will slow the fermentation and keep the drink chilled and ready to drink. It’s best to consume it within a week for optimal taste and quality.
If you need to take a break from making water kefir or have an excess supply of grains, you can store them for longer periods. Place the grains in a jar, cover them with sugar water, and store them in the refrigerator. Remember to refresh the sugar water every few weeks to keep the grains healthy. They will last weeks if not months like that. They might need one or two fermentation cycles to get back to normal after a long break.
Also, you will find your water kefir to grow exponentially. While they make a cool present for friends, there are only so many people to gift these grains to. I am experimenting with adding kefir grains to my diet as well. It would be just a shame to throw these probiotic gems away. While their texture is a bit odd, their taste is surprisingly mild. I am adding some to my smoothies and protein shakes for an extra probiotic kick!
As they have a high load of bacteria and yeast, I’d be cautious about consuming them. If considering consuming kefir grains, check how your body reacts to small amounts of the grains.
10. Frequently Asked Questions (FAQs)
Yes, it is. The SCBOBY consists of yeasts and bacteria and is naturally vegan. Different from milk kefir, water kefir is made just from SCOBY, water, sugar and optionally citrus and dried fruits, making it suitable for a vegan diet.
This depends on the water quality of your region. Usually, using tap water is preferred, as it is naturally rich in minerals, which the kefir needs to thrive. Filtered or distilled water can even impede growth. Still, if your tap water is high in chloride or contaminated, it shouldn’t be used, or sufficiently treated beforehand.
This depends on factors such as amount of sugar, amount of kefir grains, health of the kefir, conditions and temperature. Usually, for a healthy batch of kefir, it takes 24-48 hours.
If you prefer a less sweet drink, you can adjust the fermentation time. Allowing it to ferment for a longer period will consume more sugar, resulting in a less sweet taste. The kefir will have a stronger taste like this. You can also try reducing the amount of sugar used in the initial fermentation.
While kefir is generally safe to consume if prepared correctly. Some individuals may experience mild digestive discomfort initially due to the introduction of probiotics. It is recommended to start with small amounts and gradually increase consumption to allow your body to adjust.
Give your kefir grains a rinse with cold water. Add them to a clean jar or container, and top them with sugar water, a dried fruit and slice of lemon. Close the jar with a breathable lid and keep it kefir in the fridge. The cold temperature slows the fermentation process. Make sure to give the kefir new sugar water after 3-4 weeks.
Some more Recipe Inspirations:
- The ultimate kombucha guide
- The most refreshing mint lemonade
- Hot spicy mint tea
- Watermelon juice recipe
- Masala chai recipe
- Dirty chai recipe
The Ultimate Guide to Water Kefir
Let’s learn how to make one of the greatest fermented beverages ever: Water kefir! The recipe is super simple and it’s so much fun.
- Total Time: 0 hours
- Yield: 8 servings 1x
Ingredients
1/2 cup water kefir grains
8 cups water
1/2 sugar
2 tbsp dried fruit
3 slices lemon or lime
Instructions
Dissolve 1/2 cup of sugar in 8 cups of lukewarm water in a glass jar. Allow the water to cool to room temperature.
Once the sugar is dissolved, add the kefir grains to the jar.
Cover the jar with a breathable cover and secure it with a rubber band.
Allow the mixture to ferment at room temperature, away from direct sunlight, for 24-48 hours. The fermentation time may vary depending on temperature and desired taste.
After fermentation, strain the liquid using a plastic sieve or strainer, separating the water kefir grains from the liquid. Give the kefir grains a rinse with cold water. Clean the jar, and you are ready to repeat the process.
You can do a secondary fermentation with fruits, juice, herbs, or other botanicals if you like. Add the ingredients to a jar or bottle together with the kefir you made before. Allow it to ferment for additional 24-48 hours.
Notes
Scale this recipe to the amount of kefir grains you have and the size of your fermentation jar.
Other things you need for making kefir:
Glass jar or container
Breathable cover (cheesecloth or coffee filter)
Rubber band
Plastic sieve or strainer
Non-metallic utensils
Check out the article for more details on how to choose the right ingredients and how to do the secondary fermentation.
- Prep Time: 10min
- Fermentation Time: 24-24h
- Category: beverage, drink
- Method: fermentation
- Cuisine: International
- Diet: Vegan